Difference between revisions of "Creating a workflow template"
Jump to navigation
Jump to search
m (→Step-by-step description) |
(→Step-by-step description) |
||
| Line 62: | Line 62: | ||
|class="StepNum" | c. | |class="StepNum" | c. | ||
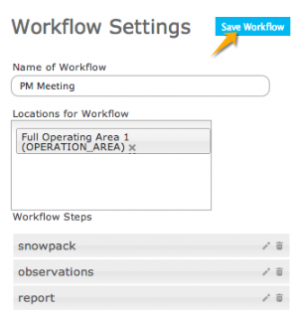
|[[file:SaveWorkflowSettings.png|300px|thumb|right|Fig 5: Save workflow steps and settings]]Select {{ButtonBlue|Save Workflow}} to save the workflow. | |[[file:SaveWorkflowSettings.png|300px|thumb|right|Fig 5: Save workflow steps and settings]]Select {{ButtonBlue|Save Workflow}} to save the workflow. | ||
| + | {{Issue| After creation of your workflow the infoEx system Workflow and Reports functionality may be impaired. Workaround: Log out of the infoEx system and run the cache clearing utility in your Chrome browser by following this link: https://training-infoex.avalanche.ca/clearcache.htm|IssueWithImage| 1085 | November 16, 2013}} | ||
| + | |||
|} | |} | ||
|} | |} | ||
Revision as of 10:20, 19 November 2013
| REQUIREMENTS | |
| Permission | Operation administrator and higher |
| Connectivity | Online and partial offline |
This document describes how to create a workflow in the infoex system.
Background
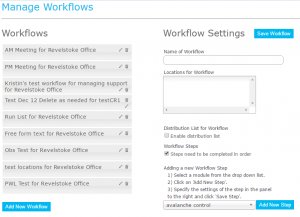
A workflow links together user-specified tasks into a logical order so that users can repeatedly move through the same steps. Creating a workflow consists of two main tasks:
- Defining the workflow name and choosing its general features
- Adding at least one workflow step and saving the workflow
Step-by-step description
| 1. | login to the infoEx system with an account that has Operation Administrator privileges. | ||||||||||||
| 2. | if you are enabled in more than one operation you must select an operation on the first screen after logging in. | ||||||||||||
| 3. | TASK 1: Create a new workflow
| ||||||||||||
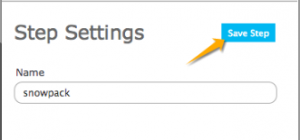
| 4. | TASK 2: Add a step to the new workflow.
|
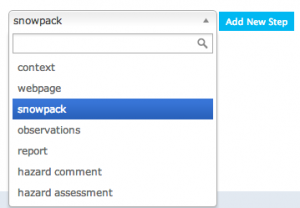
Details of: Types of workflow steps and the information required to set them up
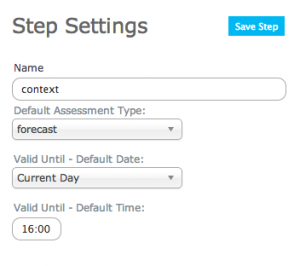
| Context: | A 'context' step provides information about the workflow itself and offers a place to record the following information:
| ||||
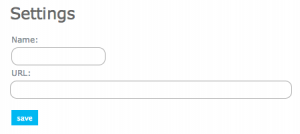
| Webpage: | A 'webpage' step allows the workflow user to view a stored webpage without leaving the application. The following information is required to set it up:
| ||||
| Snowpack: | A 'snowpack' step allows the workflow user to add a snowpack description in narrative form. The following information is required to set it up:
| ||||
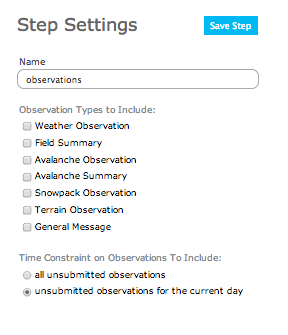
| Observation: | An 'observation' step allows you to fill out a customized observation as part of the workflow. The following information is required to set it up:
| ||||
| Reports: | A 'report' step allows you to view a customized infoex report as part of the workflow. The following information is required to set it up.
| ||||
| Hazard Comment: | A 'hazard comment' step allows you to create and add a comment about avalanche hazard in narrative form to your workflow. The following information is required to set it up:
| ||||
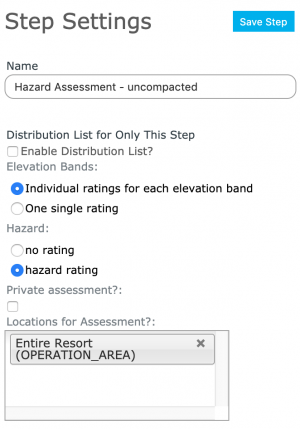
| Hazard Assessment: | A 'hazard assessment step allows you to create and add a hazard assessment to your workflow. The following information is required to set it up:
|
Related documents
- How to add a location to your operation.
- Customizing a report
Functionality tested by
Functionality tested by
- Date: Nov. 15, 2013 / John Kelly / QA Server / Version 3.0.0

