Difference between revisions of "Viewing photo overlays"
Jump to navigation
Jump to search
(→Step-by-step description) |
|||
| Line 9: | Line 9: | ||
|- | |- | ||
|class="StepNum" | 1. | |class="StepNum" | 1. | ||
| − | |Click on the EXTENSIONS menu and | + | |Click on the EXTENSIONS menu and select Photo Overlay Viewer. |
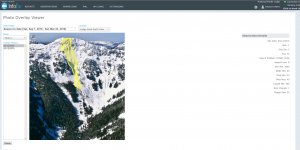
|rowspan=2|[[File:Photo_Overlay_Viewer.PNG|300px|thumb|right|Fig. 1: Photo Overlay Viewer.]] | |rowspan=2|[[File:Photo_Overlay_Viewer.PNG|300px|thumb|right|Fig. 1: Photo Overlay Viewer.]] | ||
|- | |- | ||
Revision as of 06:45, 3 June 2017
| REQUIREMENTS | |
| Permission | All user levels |
| Connectivity | Online only |
This document describes how to view photo overlays submitted with avalanche observations, avalanche control observations or snowpack observations.
Step-by-step description
| 1. | Click on the EXTENSIONS menu and select Photo Overlay Viewer. | |
| 2. | Select the Date Range, Location and Photo to display all overlays for your selection (Fig 1). | |
| 3. | Click on the date under Overlay History to view your desired overlay or use CTRL or SHFT to select multiple overlays to be displayed on top of each other. Holding CTRL and clicking to select overlays allows you to select any combination of overlays. Use SHFT to select a full range by clicking on the first overlay of interest and then the last to highlight the full range. |
Related documents
Functionality tested by
- May 30, 2017: Stuart Smith
