Difference between revisions of "Editing locations in the location catalog"
(→Step-by-step description) |
(→Functionality tested by) |
||
| Line 41: | Line 41: | ||
==Functionality tested by== | ==Functionality tested by== | ||
| − | * Oct. 21: Pascal Haegeli / QA Server / Test Version 0.31.00 | + | * Oct. 21: Pascal Haegeli / QA Server / Test Version 0.31.00 |
| − | [[Category:Super User]][[Category:Operation Administrator]][[Category:Locations]][[Category:Software Issues]][[Category:Version 0.31.00]] | + | [[Category:Super User]][[Category:Operation Administrator]][[Category:Locations]][[Category:Software Issues]][[Category:Version 0.31.00]] |
Revision as of 18:58, 21 October 2013
| REQUIREMENTS | |
| Permission | Operation Administrator or higher |
| Connectivity | Online only |
This document describes how to edit locations in the location catalog of your operation.
Background
The ability to edit locations and delete obsolete location from your from the location tree of an operation should allow users to main a clean catalog of relevant location at all time. However, please note that the editing locations affects all observations that have ever been associated with the given location. For example, if you change the location of a weather site, all associated historic observations will be moved to the new location. Similarly, when you change the name of a ski run, all of the associate historic avalanche observation will then be associated with the new name of the ski run.
We recommend the following guidelines for the maintenance of your location catalog:
- Editing is appropriate for minor changes in the attributes (e.g., fixing of typos, name changes, minor adjustments of their geometries) of location that still represent the same piece of terrain. This approach will ensure that that time series (e.g., long-time observations at a weather site with a changing name) will be maintained.
- If the geometry of a location changes considerable, it would be better to delete the location and create a new location under the same name. This approach will ensure that all observations associated with this location are displayed at their appropriate locations.
Step-by-step description
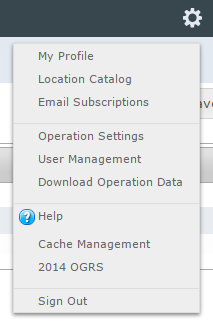
| 1. | Select the Location Catalog from the administration menu (cog wheel) in the top left corner of the screen (Fig. 1). To have access to this menu item, you need to be either an operation administrator or a super user. | ||
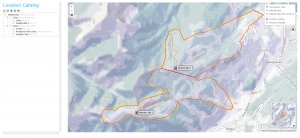
| 2. | This will get you to the location catalog screen of the application (Fig. 2). Please note that depending on your connectivity and the size of your location catalog, it might take a while to start Google Earth and load your entire location catalog. The location catalog screen shows your location hierarchy tree on the right and a Google Earth map on the right.
| ||
| 3. | Expand the location hierarchy tree on the right as required by clicking on the little plus (+) signs left of locations that contain other locations.
| ||
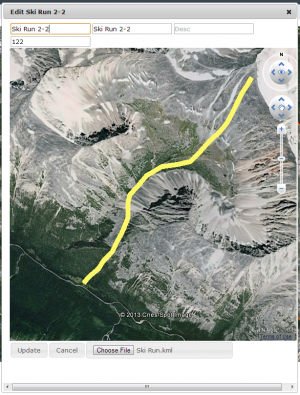
| 4. | Right click on the the location you would like to edit. This will open a small menu with an edit option. Select the edit option. This will open a pop-up window with a second Google Earth map that contains the existing information of the location and a maps that will immediately zoom to the area of the location (Fig. 3).
| ||
| 5. |
Related documents
- Link to relate document 1
- Link to relate document 2
Functionality tested by
- Oct. 21: Pascal Haegeli / QA Server / Test Version 0.31.00


