Difference between revisions of "Saving a report as an InfoEx report template"
Jump to navigation
Jump to search
m |
m (→Related documents) |
||
| Line 22: | Line 22: | ||
|} | |} | ||
==Related documents== | ==Related documents== | ||
| − | |||
| − | |||
==Functionality tested by== | ==Functionality tested by== | ||
Revision as of 15:26, 29 October 2013
| REQUIREMENTS | |
| Permission | All user levels |
| Connectivity | Online only |
This page describes how a customized report template can be saved for future use.
Background
Reports can be customized by selecting date ranges, locations, observations, and by preferred ordering and layout.
The style of the resulting report can be preserved and duplicated for future reports. The resulting templates can be used to streamline workflows and improve the efficiency of information visualization and interpretation.
The following information assumes you are logged in to the InfoEx application, you have selected an operation (if you have more than one valid operation) and you have selected 'Reports' on the main application menu.
Step-by-Step Description
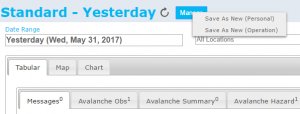
| 1. | To preserve a report (including the tables, dates, locations, and applied filters) select the down arrow beside the report name (fig. 3). You can create and name a new report by selecting 'save current view' and 'save as new'. |
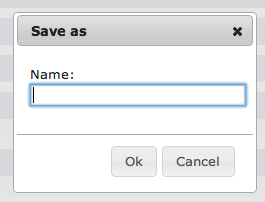
| 2. | Select a descriptive name for the InfoEx report and select Ok (fig. 4). The report view is now saved and available on the list of report views that appears when you select the down arrow beside the report name. |
Related documents
Functionality tested by
- Date: Oct. 29: John Kelly / QA Server / Test Version 0.32.00)

