| REQUIREMENTS |
| Permission |
All user levels |
| Connectivity |
Online and Offline |
This page describes how to customize an observation entry form for the specific needs of your operation.
Background
Many operations will routinely carry out observations that are a subset of observations permitted under OGRS. InfoEx permits you to drag and drop all observation fields into a custom data entry area so that they are grouped together in a form. The positioning of fields can also be adjusted to match the order of your operation's field books, or to match the flow of information in your operation.
Step-by-step description
The observation entry forms can be customized from anywhere they are accessed
- Any of the options under the OBSERVATION menu ('Enter & Submit', 'Enter & Share', 'Review & Submit')
- Observation entry screen in workflows
| 1.
|
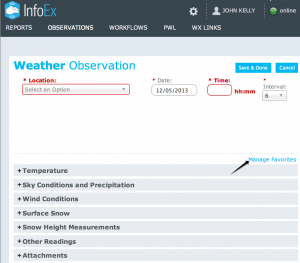 Fig. 1: To enable the customization mode of InfoEx, enable managing of favourites |
| 2.
|
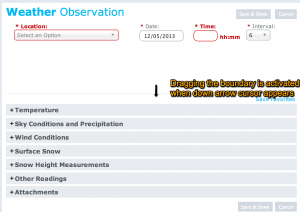 Fig. 2: Creating the custom observation space
| NOTE |
The size of the custom observation space can be adjusted at any time while you are in customization mode |
|
| 3.
|
 Fig. 3: Expanding the Observation Section |
| 4.
|
 Fig. 4: Dragging observation fields to the custom observation entry space
| NOTE |
You can adjust the position of all labels within the custom observation entry space at any time when you are in customization mode by positioning the cursor on their label and dragging them to the desired location |
| NOTE |
Some of the observation fields will drag in groups. For example, dragging HST or HSTW into the custom observation entry space will automatically bring HST Date Cleared and HST Time Cleared along. These are mandatory fields for any HST entries. |
|
| 5.
|
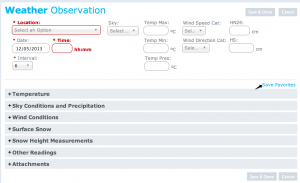 Fig. 5: Saving a Custom Observation Form |
| 6.
|
The next time you open this observation entry form on this computer, it will be presented to you in the customized form with all of the thematic sections collapsed below.
| NOTE |
The customization of observation entry forms is a computer-specific setting. However Observation templates can be saved to allow use of the same forms on multiple computers. Templates may display differently on computers with different screen sizes. |
| NOTE |
Once the observation entry forms have been customized on a computer, anybody using InfoEx on this computer will see the same customized forms unless a different template is loaded. |
|
| 7.
|
Enter your observation into the customized entry form. You can tab from one field to the next as you expect (left to right; top to bottom). You can record observations that are not in your custom observation template by expanding the appropriate section and entering the observation there.
| NOTE |
If an entry field is skipped when you tab through the form, it is likely positioned slightly lower than the other field in the same row. Slightly adjusting the vertical position of the field should solve the problem. You need to close and reopen the form for the tab order to be recalculated. |
|
Related documents
[1] Click to watch a help video
[2] Click to watch a help video
Functionality tested by


