Difference between revisions of "Adding locations to the location catalog"
Jump to navigation
Jump to search
(→Step-by-step description) |
(→Functionality tested by) |
||
| Line 65: | Line 65: | ||
* Dec. 22: Pascal Haegeli | * Dec. 22: Pascal Haegeli | ||
| − | [[Category:Super User]][[Category:Operation Administrator]][[Category:Locations | + | [[Category:Super User]][[Category:Operation Administrator]][[Category:Locations]][[Category:Version 3.4.0]] |
Revision as of 10:55, 22 December 2013
| REQUIREMENTS | |
| Permission | Operation Administrator or higher |
| Connectivity | Online only |
This document describes how to add locations to the location catalog of your operation.
| NOTE | If you are experiencing issues with the Google Earth plugin, please see Known issues with the Google Earth plugin for a list of known issues and suggestions for possible solutions. |
Step-by-step description
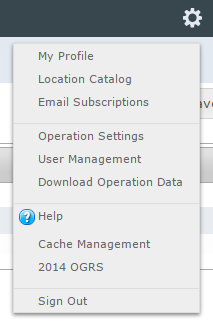
| 1. | Select 'Location Catalog' from the administration menu (cog wheel) in the top left corner of the screen (Fig. 1). | ||
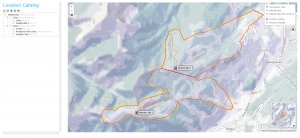
| 2. | This will get you to the location catalog screen of the application (Fig. 2). Please note that depending on your connectivity and the size of your location catalog, it might take a while to start Google Earth, load your entire catalog and display all of the locations. A progress bar at the top of the catalog provides information on the status of the loading and drawing process.
The location catalog screen shows your location hierarchy tree on the right and a Google Earth map on the right. | ||
| 3. | Expand the location hierarchy tree on the right as required by clicking on the little plus (+) signs left of locations that contain other locations.
The locations in the location tree are sorted by location type first and within each type, they are sorted alphabetically. The location types are sorted as follows: | ||
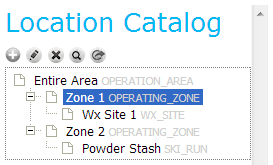
| 4. | Navigate to the intended parent of the new location and click on it. The parent location is now highlighted in blue (Fig. 3) and the map will automatically zoom to the location of the parent location. To add a location either click on the | ||
| 5. |
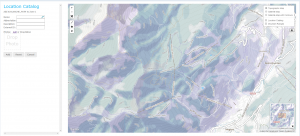
You will now be presented with a blank Google Earth map and a dialog box for information about the new location on the left (Fig. 4). Enter the following information for the new location into the fields provided:
| ||
| 6. | Add an appropriate geometry to the location. See Location types and symbology for details on the supported geometries for the different location types.
There are two options for adding geometries to a location:
| ||
| 7. | Click on Add to add the new location to the location tree of the operation. This will add the new location to the location tree and return you to the regular location catalog screen (Fig. 2). |
Related documents
- Deleting locations from the location catalog
- Editing locations in the location catalog
- Changing the hierarchy among your locations
- Searching for a location in the location catalog
Functionality tested by
- Dec. 22: Pascal Haegeli


