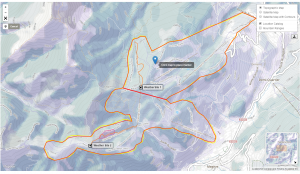
Creating the geometry of a new location using the available drawing tools
| REQUIREMENTS | |
| Permission | Operation Administrator and higher |
| Connectivity | Online only |
This document describes how to create location geometries with the available drawing tool directly in the InfoEx system.
Step-by-step description
The following sections discuss the creation of polygon, line and point geometries separately:
- Drawing a polygon
Location types that support a polygon geometry include Operation area, Forecast area, Operating zone, Permanent closure, Ski run and Avalanche path. - Drawing a line
Location types that support a line geometry include Road, Rail, Route, Control Route, Ski run and Avalanche path. - Drawing a point
Location types that support a point geometry include Operation area, Ski run, Avalanche path, Weather site and Shot placement.
| ISSUE | The system currently does not support multi-geometries (i.e., multiple, separate polygons, lines or points associated with a single location). Workaround: Please contact InfoEx support staff at the CAA to discuss possible solutions. JIRA: -772 (Aug.13, 2013) |
Drawing a polygon
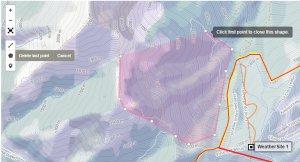
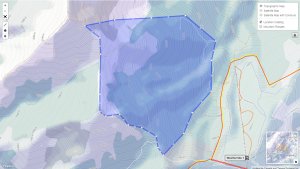
Location types that support a polygon geometry include Operation area, Forecast area, Operating zone, Permanent closure, Ski run and Avalanche path.
Drawing a line
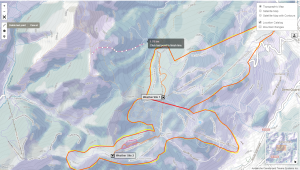
Location types that support a line geometry include Road, Rail, Route, Control Route, Ski run and Avalanche path.
| 1. | After entering the name and abbreviation of a location move to the map to enter the appropriate geometry. | ||
| 2. | Drag the map to the desired general location zooming in or out if necessary | ||
| 3. | To show the geometries of all of your existing locations, click to check on Location Catalogue. | ||
| 4. | To show the boundaries of the mountain range polygons used for creating the mountain range associations in the InfoEx report, click to check on Mountain Ranges. | ||
| 5. | To draw a new line on the map, click on the
| ||
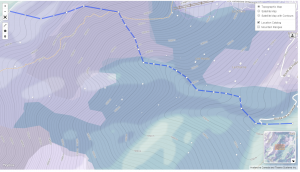
| 6. | The line will now have shaded circles in the middle between each pivot point (Fig. 4). You have the following options for editing your line:
To completely start fresh, click on the | ||
| 7. | Once you are happy with the shape of your line, click on Add in the left panel to submit the new location to InfoEx. If you have forgotten to complete one of the required fields, you will get an error message and the incomplete field will be highlighted with a red frame.
|
Drawing a point
Location types that support a point geometry include Operation area, Ski run, Avalanche path, Weather site and Shot placement
| 1. | After entering the name and abbreviation of a location move to the map to enter the appropriate geometry. | ||
| 2. | Drag the map to the desired general location zooming in or out if necessary. | ||
| 3. | To show the geometries of all of your existing locations, click to check on Location Catalogue. | ||
| 4. | To show the boundaries of the mountain range polygons used for creating the mountain range associations in the InfoEx report, click to check on Mountain Ranges. | ||
| 5. | To draw a new point location on the map, click on the
| ||
| 6. | To change the location of your point, drag and drop the paddle at your desired location. | ||
| 7. | Once you are happy with the location of your point location, click on Add in the left panel to submit the new location to InfoEx. If you have forgotten to complete one of the required fields, you will get an error message and the incomplete field will be highlighted with a red frame. |
Related documents
- Location catalog overview
- Location types and symbology
- Location hierarchy
- Adding locations to the location catalog
- Editing locations in the location catalog
- Deleting locations from the location catalog
- Changing the hierarchy among your locations
- Searching for a location in the location catalog
- Viewing photos
- Downloading your location catalog as a KML file
Functionality tested by
- Dec. 22: Pascal Haegeli
