Specifying the tables to be included in an InfoEx report
Jump to navigation
Jump to search
| REQUIREMENTS | |
| Permission | All user levels |
| Connectivity | Online only |
This page shows you how to customize an InfoEx report to include only the observations you require
Background
Users can specify the tables included the InfoEx report and order them as desired.
Available tables include:
- Mesages
- Avalanche observations
- Field summary
- Avalanche summary
- Snowpack observations
- Terrain
- Weather observations
- Avalanche problems
- Avalanche hazard
- Snowpack description
- Persistent weak layers
The following information assumes you are logged in to the InfoEx application, you have selected an operation (if you have more than one valid operation) and you have selected 'Reports' on the main application menu.
Step-by-step description
| 1. | To access the available tables select the 'settings' icon on the upper right of the 'Reports' page (fig. 1). |
| 2. | A dropdown menu will appear offering selections for the layout, grouping, and table types for the report that will be produced (Fig.2). For a description of layout and grouping options see: Specifying the order of the tables in an InfoEx report and Grouping of observations within tables. |
| 3. | Activate the desired tables for your InfoEx report by clicking on their label. Activated tables will appear in full contrast, deactivated tables will appear greyed out. You may adjust the ordering of the tables by dragging the labels into the desired sequence. Once you are satisfied with your selection select Okay. The selected tables will immediately appear. |
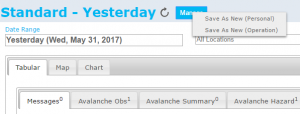
| 4. | To preserve this report (including the tables, dates, and locations) select the down arrow beside the report name (fig. 3). You can create and name a new report by selecting 'save current view' and 'save as new'. |
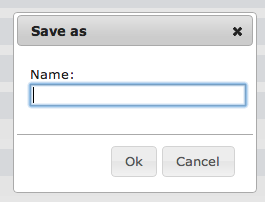
| 5. | Select a descriptive name for the InfoEx report and select Ok (fig. 4). The report view is now saved and available on the list of report views that appears when you select the down arrow beside the report name.
|
Related documents
Customizing reports
- Content
- Layout
Managing report templates
- Saving a report as an InfoEx report template
- Modifying an existing InfoEx report template
- Deleting an existing InfoEx report template
- Signing up for the daily InfoEx report emails
Functionality tested by
- Date: Oct. 29: John Kelly / QA Server / Test Version 0.32.00)
Related documents
Functionality tested by
- Oct 29: John Kelly / QA Server / Test Version 0.32.00


