Adding or removing columns of individual tables in an InfoEx report
Jump to navigation
Jump to search
| REQUIREMENTS | |
| Permission | All user levels |
| Connectivity | Online only |
Background
Users can specify the columns included for each of the tables of the InfoEx report and order them as desired. Each table has different columns available that can be selected and ordered independently. Column preferences can be preserved by saving the report view once you have adjusted columns according to your preference (see Saving a report as an InfoEx report template)
The following information assumes you are logged in to the InfoEx application, you have selected an operation (if you have more than one valid operation) and you have selected 'Reports' on the main application menu.
Step-by-step description
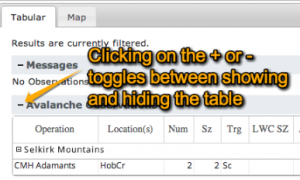
| 1. | Select the table that you want to arrange the columns in. Ensure that the table is fully expanded by looking for the + or - on the right side of the table header. Click on the + to expand the table (fig. 1). | ||
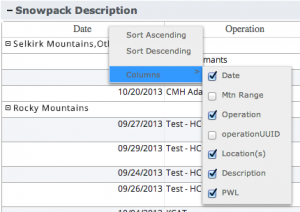
| 2. | Left click anywhere on the top row of the table to activate a popup menu. Select 'Columns' from the menu (fig. 2). For an explanation of sorting options see: Applying filters to individual tables in an InfoEx report | ||
| 3. | By checking (or unchecking) the desired columns you can add or subtract columns from the table you are in.
| ||
| 4. | The table will immediately be updated with new column selection without downloading the data from the server again. |
Related documents
Customizing reports
[1] Click to watch a help video
[2] Click to watch a help video
- Content
- Specifying the date or date range of an InfoEx report
- Restricting the locations included in an InfoEx report
- Specifying the tables to be included in an InfoEx report
- Adding or removing columns of individual tables in an InfoEx report
- Applying filters to individual tables in an InfoEx report
- Including or excluding proprietary information in an InfoEx report
- Layout
Managing report templates
- Saving a report as an InfoEx report template
- Modifying an existing InfoEx report template
- Deleting an existing InfoEx report template
- Signing up for the daily InfoEx report emails
Viewing report templates
Map Layers
- Operation overview
- Avalanche observations
- Avalanche hazard
- Snow Profiles
- Field summary
- Weather observations
- Time slider (used for all map layers)
- Additional external information sources
Charts
Functionality tested by
- Dec. 31, 2013: Pascal Haegeli

