Specifying the date or date range of an InfoEx report
Jump to navigation
Jump to search
| REQUIREMENTS | |
| Permission | All user levels |
| Connectivity | Online only |
This document describes how to specify the date or date range of an InfoEx report.
Background
Users can specify a date or date range for the InfoEx report. Once the time period is specified, the application queries the InfoEx server and retrieves all of the information required for the current report template and the requested time period.
Step-by-step description
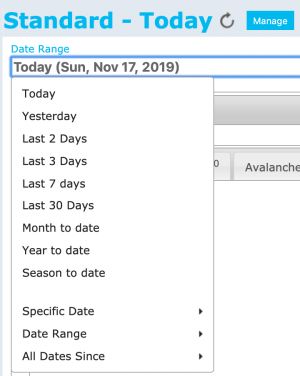
| 1. | Click into the text box under the 'Date Range' label of the report view (Fig. 1). | ||
| 2. | Select the appropriate date or date range for your InfoEx report (Fig. 2). The available options include:
Relative dates or date ranges:
Absolute dates or date ranges
| ||
| 3. | Wait while the application retrieves the data for the new date or date range from the server and displays it in the current view. |
Related documents
Customizing reports
- Content
- Layout
Managing report templates
- Saving a report as an InfoEx report template
- Modifying an existing InfoEx report template
- Deleting an existing InfoEx report template
- Signing up for the daily InfoEx report emails
Functionality tested by
- Dec. 31, 2013: Pascal Haegeli

