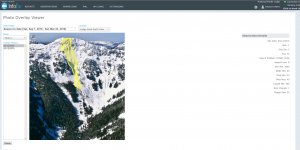
Viewing photo overlays
Jump to navigation
Jump to search
| REQUIREMENTS | |
| Permission | All user levels |
| Connectivity | Online only |
This document describes how to view photo overlays submitted with avalanche observations, avalanche control observations or snowpack observations.
Step-by-step description
| 1. | Click on the EXTENSIONS menu and picK Photo Overlay Viewer. | |
| 2. | Select the Date Range, Location and Photo to display all overlays for your selection (Fig 1). | |
| 3. | Click on the date to view your required overlay or use CTRL or SHFT to select multiple overlays to be displayed. Holding CTRL and clicking to select overlays allows you to select any combination of overlays. Use SHFT to select a full range by clicking on the first overlay of interest and then the last to highlight the full range. |
Related documents
Customizing reports
[1] Click to watch a help video
[2] Click to watch a help video
- Content
- Specifying the date or date range of an InfoEx report
- Restricting the locations included in an InfoEx report
- Specifying the tables to be included in an InfoEx report
- Adding or removing columns of individual tables in an InfoEx report
- Applying filters to individual tables in an InfoEx report
- Including or excluding proprietary information in an InfoEx report
- Layout
Managing report templates
- Saving a report as an InfoEx report template
- Modifying an existing InfoEx report template
- Deleting an existing InfoEx report template
- Signing up for the daily InfoEx report emails
Viewing report templates
Map Layers
- Operation overview
- Avalanche observations
- Avalanche hazard
- Snow Profiles
- Field summary
- Weather observations
- Time slider (used for all map layers)
- Additional external information sources
Charts
Functionality tested by
- Jan 1, 2014: Pascal Haegeli
